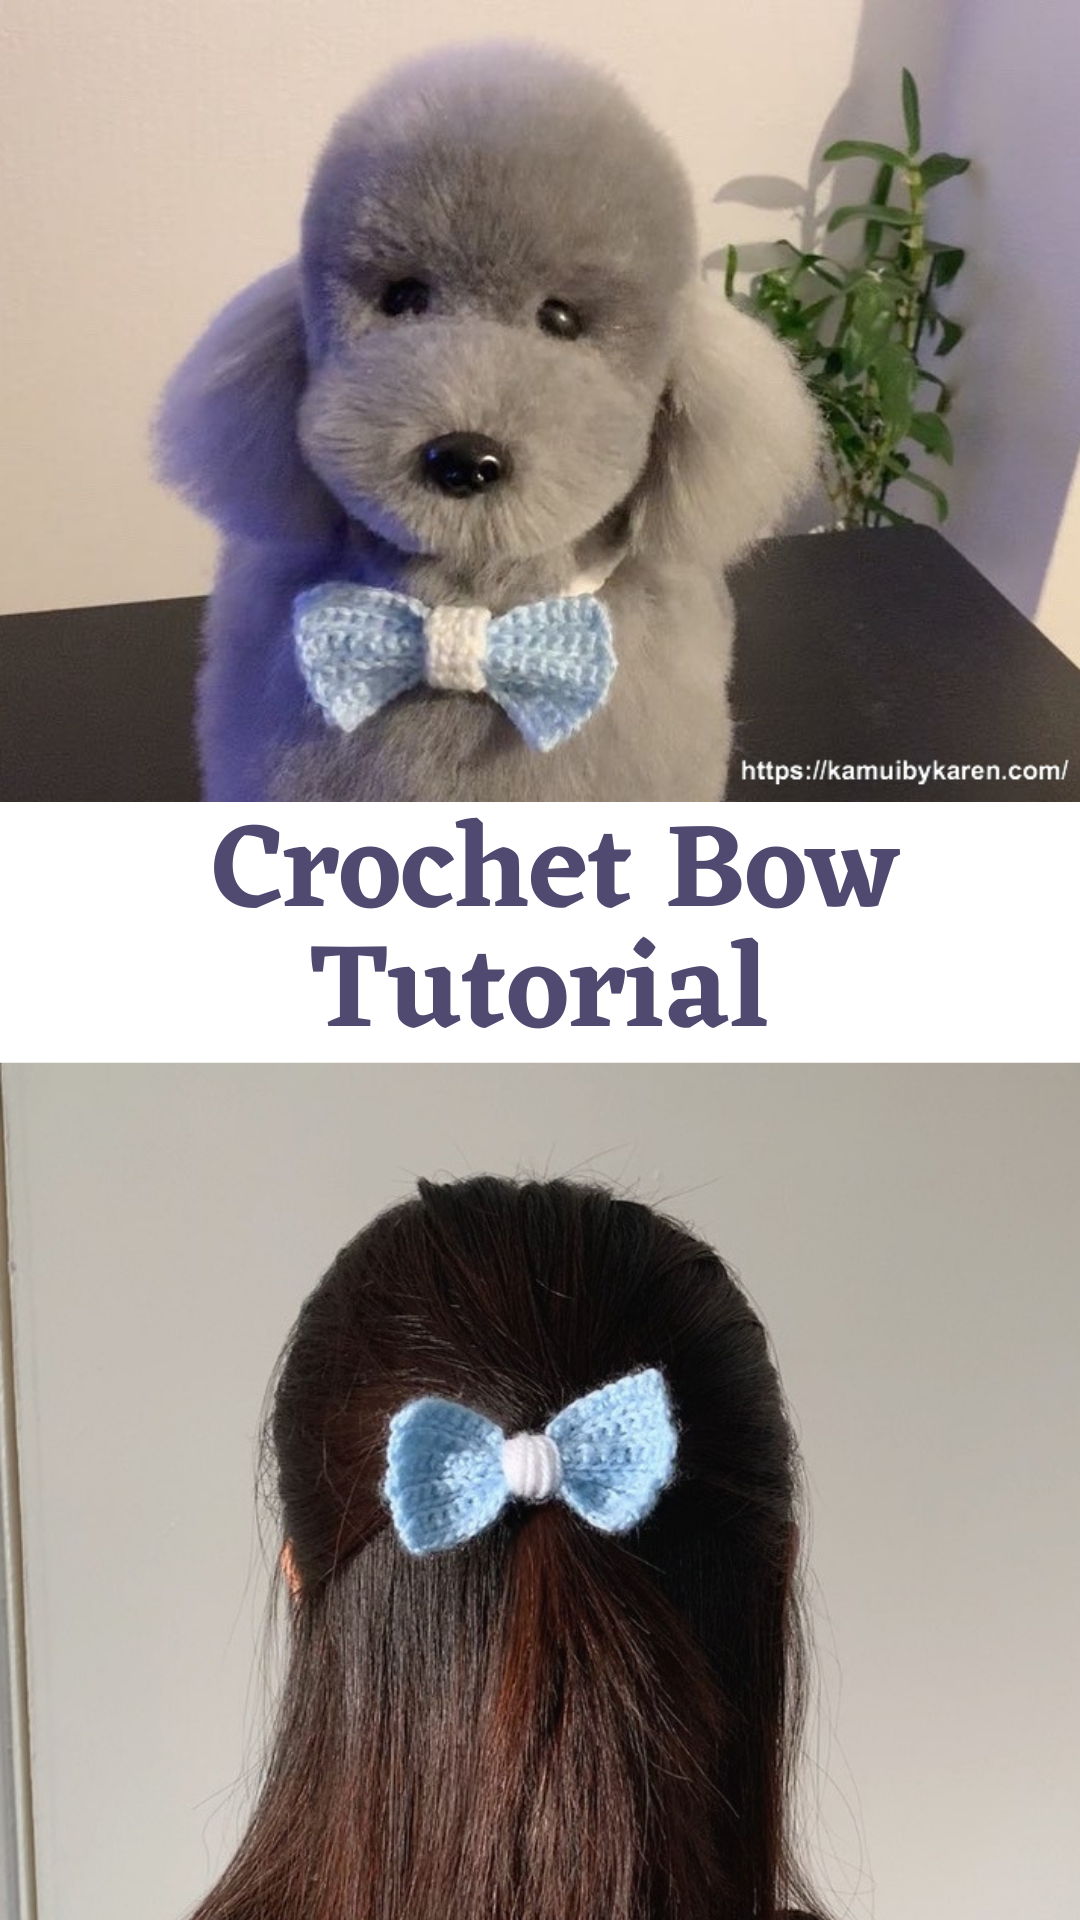
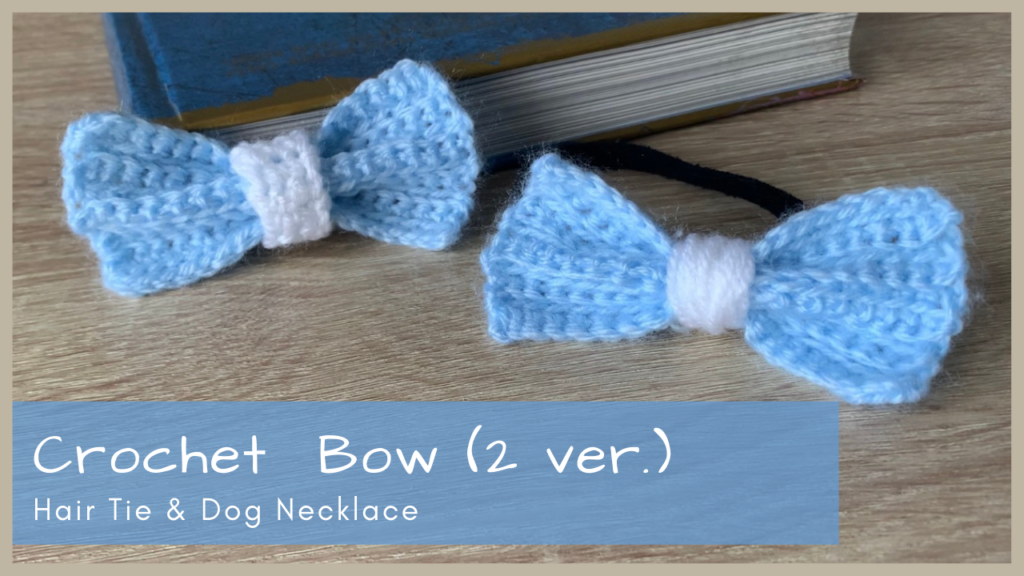
In this crochet beginner tutorial, I’ll share how to make TWO versions of crochet bow.
You only need to know ONE stitch – Single Crochet!
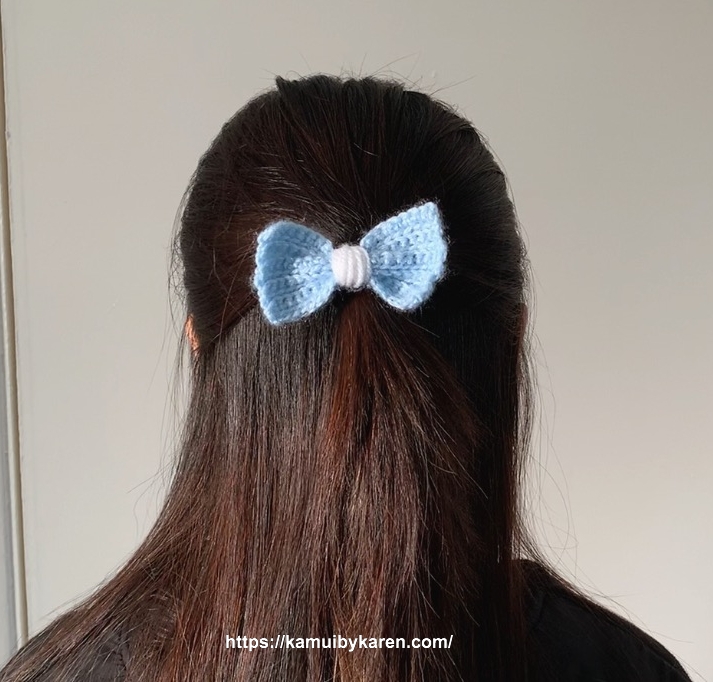
In the video tutorial, I’ll show you how to turn crochet bows into hair tie and dog accessories.
Of course you can use them in many other projects such as earrings and kid’s bow tie.
If you’re not very familiar with some of the basic crochet techniques, try out my basic techniques tutorial!
Crochet Tutorial | How to Crochet: Magic Circle, Slip Knot & Chain (Video)
How to Crochet | Single, Half Double, Double & Treble Crochet
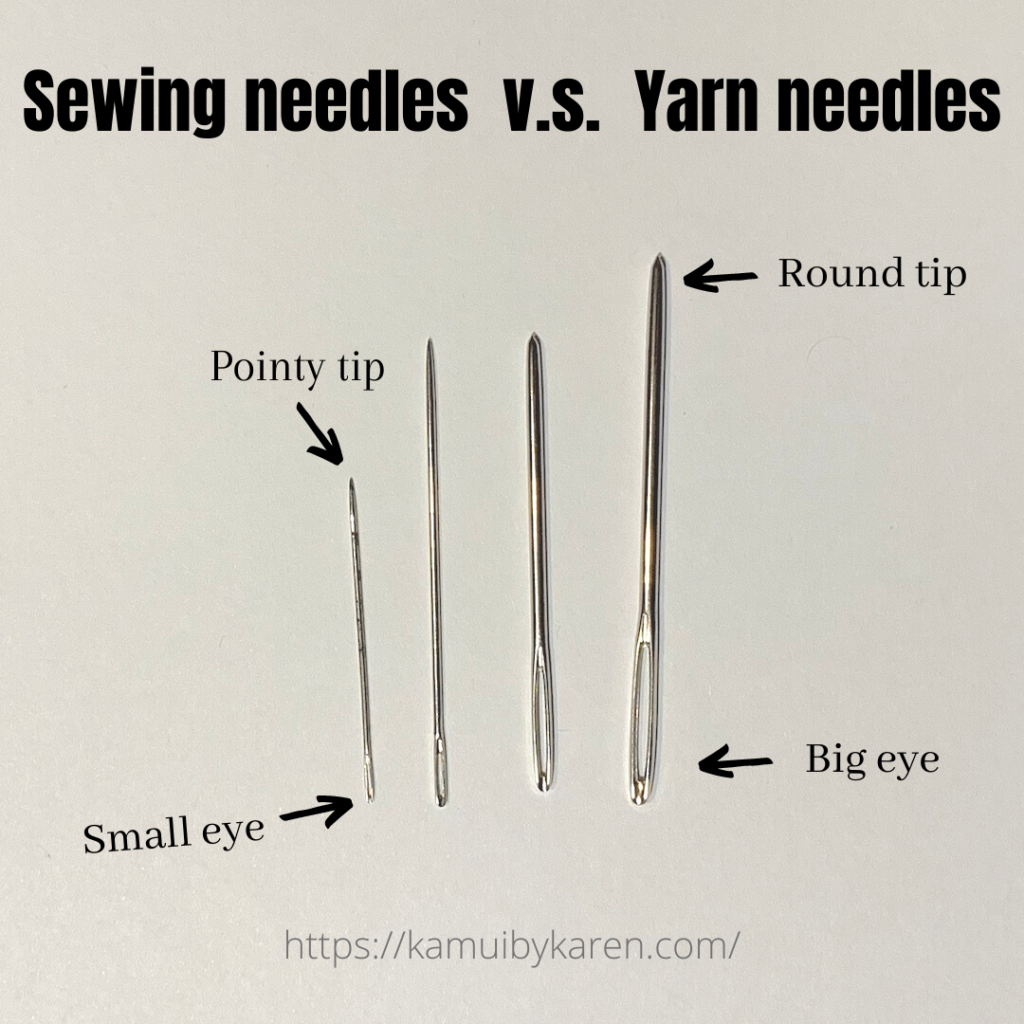
Materials & Tools
Yarn (100% Acrylic)- Blue, White
Crochet hook 3.50mm & 4.00 mm
Yarn needle
Size of crochet bow
around 9×5 cm (Width x Height)
Crochet Tips & Knowledge for you
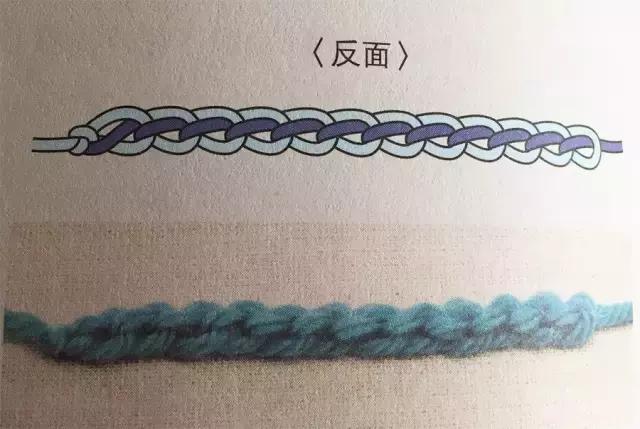
- You can basically divide a chain into 3 parts.
Firstly, at the front of foundation chain, the loop closer to you is called Front Loop. Secondly, the loop farther is Back Loop. Lastly, turn to the back of your chain, there are strands running through the middle of chains which are the Back Bumps. -

The dark blue strands illustrated are the back bumps of chains. (Source:kknews) Front Loop (Right) and Back Loop (Left) (Source:kknews) - Crochet foundation chains with a bigger hook, then change to a smaller hook when you crochet in the back bumps. Crocheting in back bumps is a lot easier when your foundation chains are loose.

⬇️Crochet Beginner Tutorial – Crochet Bow⬇️
Turn on C.C for English subtitle!
Crochet bow (Version 1) – Fully crocheted version
This version is made of a big and a small crochet rectangle.
The bigger rectangle forms the main body of crochet bow while the small rectangle is sewn together to tie the bow up.
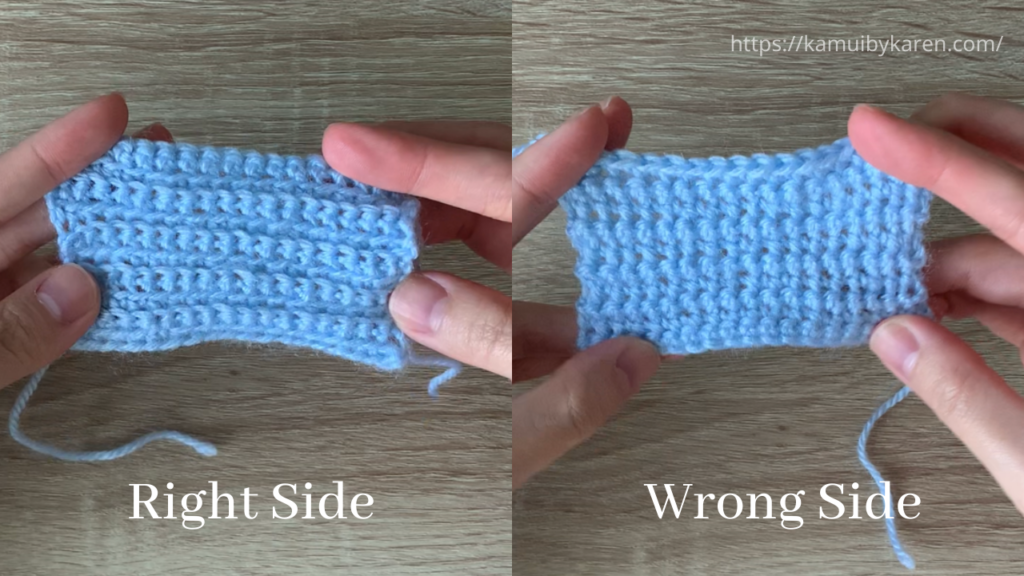
A tip for you when you crochet the bow:
** Pay attention to whether you are working on the right side or the wrong side of your work! **
You can see front loops popping in straight horizontal lines on the right side of your work.
Crochet Bow (Single Crochet Only) Pattern
** If you wish to increase the size of bow, you can simply increase the number of rows and/or chains as well as stitches. **
** Starting chain of each row does not count as a stitch **
① Main body of bow (Blue colour) 5x9cm
Chain 18 with 4.00mm hook.
Row 1: Change to 3.50mm hook. Chain (ch) 1. Starting from the 2nd back bump, single crochet (sc) 18. [Now you’re on the right side of work]
Row 2:Ch 1. Flip your work, sc in front loop only in each stitch. (18) [wrong side]
Row 3:Ch 1. Flip your work, sc in back loop only in each stitch. (18) [right side]
Repeat the steps in Row 2-3 until you finish Row 10. Row 2 for even row and Row 3 for odd row.
Fasten off and weave in.
② Middle knot (white) 2x5cm
Chain 3 with 4.00mm hook.
Row 1:Change to 3.50mm hook. Ch 1, sc 3 in back bumps.
Row 2:Ch 1. Flip, ch 3. (3)
Repeat the steps in Row 2 until you finish Row 10. Fasten off and leave a longer yarn tail for sewing.
Weave in the yarn tail of foundation chain.
Next, you can see 3 chains at both ends of the middle knot. Sew them together accordingly through the loops facing outside only.
③ Fold the main body of bow (Blue), it should look like a ”W” shape from the side view.You can sew the middle together if you want it to hold better shape!
④ Tuck it into the middle knot while maintaining the ”W” shape. Adjust the location of middle knot and it’s done!
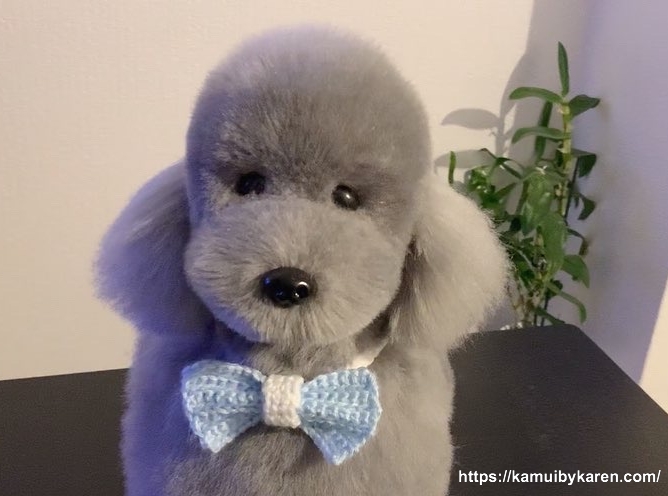
In my crochet bow video tutorial, I turned my bow into dog accessories simply by inserting crochet dog collar into the back of the bow. Any dog collar will work fine. If your collar is bigger, just make a bigger middle knot or even a bigger bow!
Crochet bow (Version 2) – The Wrapping Yarn version
To make this version of crochet bow, you only need to crochet the main body of bow. The pattern will be the same as version 1. Instead of crocheting the middle knot, you will be wrapping yarn around the middle. It’s a lot easier and saves you time!
- Fold the main body of bow (Blue), it should look like a ”W” shape from the side view.
- Wrap around the middle of bow with double strands of yarn (white) until you achieve the thickness and width you want.
- Turn to the back of bow. Slowly pull the yarn tails through the middle knot using your crochet hook. Do not pull the whole strands straight away and you can see a loop slowly forming. At this time, pull yarn tails through this loop and tighten it. This creates a knot.
- Pull one of the double strands through the middle knot. Tie a simple knot twice.
- Cut yarn.
If you want to turn crochet bow into hair tie, simply insert hair tie into the gap at the wrong side of the work before wrapping it with yarn. Wrapping yarn around can fixate the hair tie pretty well!
For this part, I think it’s easier to understand by watching my crochet bow video tutorial. Why not check it out?!
How do you think about this crochet bow? I wish you will share your work with me! ٩(ˊᗜˋ )و
If you want to find out more about my craft, follow my Instagram: Kamui by Karen.
Happy crocheting!
More Crochet Beginner Tutorial:


Other craft tutorial: